
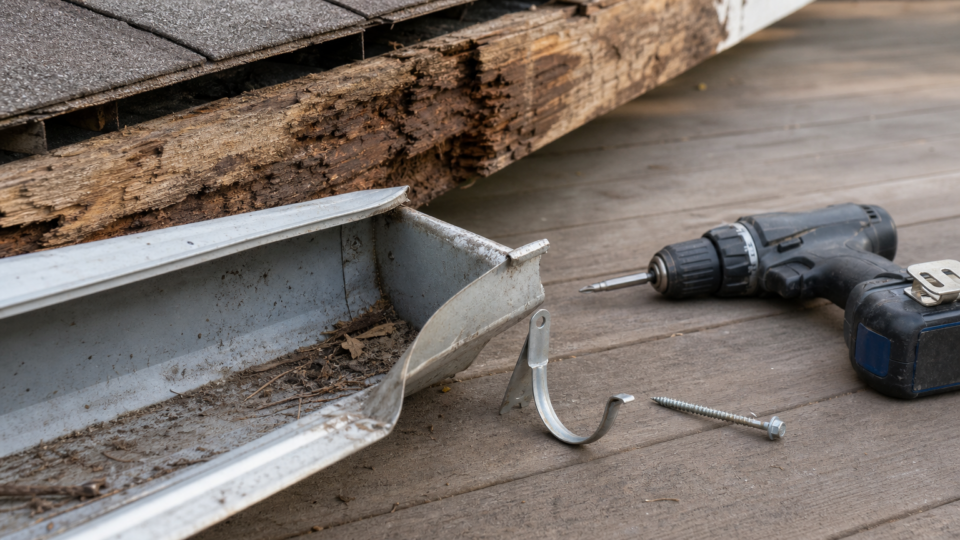
Short answer: A gutter that separates from the roofline is more than an eyesore. Water spills behind it, soaks the fascia, and can work its way into the soffit and rafters. If you need to know how to fix a gutter pulling away from the house, the good news is that most cases are a one-afternoon DIY job with basic tools. Ready for quotes? Compare local pros →
In this guide
Here is the short answer. Find out why the gutter let go, then reattach it to solid wood using hidden hangers or long structural screws. Rotted fascia, old spikes that backed out, and heavy debris or ice are the usual causes. Fix the cause first, or the new hardware will fail too.
As a former gutter installer would tell you, the order of the work matters. This guide walks you through diagnosing the problem, checking the fascia for rot, setting the right slope, and choosing between hangers, brackets, and screws. It also covers when a repair stops making sense and a pro quote is the smarter move.
Why gutters pull away and what you need first
Gutters rarely fail overnight. A gutter that is pulling away from the house has usually been loosening for a season or two, and the warning signs are easy to spot: a visible gap at the top edge, water stains on the fascia, or a sag between hangers.
The four usual causes
Whether you say the gutter is pulling away from the roof edge or from the fascia, the board behind it is what matters. These are the culprits I see most often:
- Backed-out spikes and ferrules. Older systems were nailed on with long spikes. Years of expansion, contraction, and vibration work them loose.
- Rotted fascia. Clogged gutters hold water against the wood. Screws cannot grip soft, spongy board.
- Excess weight. Water weighs about 8 pounds per gallon. Wet leaves, standing water, and ice bend hangers and pull fasteners out.
- Too few hangers. Spacing wider than 24 inches lets the gutter flex and peel away.
Of these, rot matters most, because it decides whether you can simply reattach or must repair the rotted fascia first. You will check for it in Step 1.
Hardware only holds as well as the wood behind it.
Tools and materials to gather
Most of this list is already in a typical garage. Buy the hangers and screws before you start, since matching your gutter size (usually 5 or 6 inches) avoids a second trip mid-job.
| Item | What it is for |
|---|---|
| Ladder with a standoff stabilizer | Safe access without crushing the gutter |
| Cordless drill and driver bits | Driving screws into the fascia |
| Hidden hangers with screws, or 3-inch exterior screws | Reattaching the gutter securely |
| Pry bar and pliers | Pulling old spikes and ferrules |
| 4-foot level, tape measure, chalk line | Marking slope and hanger spots |
| Exterior wood filler or replacement fascia board | Repairing minor rot |
| Gloves, safety glasses, garden hose | Protection and the final flow test |
Plan on a helper for runs longer than 10 feet. A second person holding the gutter keeps it from bending while you drive screws, and a spotter at the ladder is cheap insurance.
What should this cost you?
Answer four questions and get a fair price range for your home.
Step 1. Find the cause and check the fascia
Before you buy anything else, spend 15 minutes on diagnosis. The cause decides the repair, and skipping this step is why many fixes fail within a year.
Read the damage from the ground and the ladder
Stand back about 15 feet and sight along the run. Look for a gap at the top edge, a dip between hangers, or water stains on the fascia. When a gutter is pulling away from the house in one spot, the neighboring hangers are usually loose too. Climb up, tug each hanger by hand, and mark the loose ones with chalk. Note what you find:
- Old spikes sticking out or missing entirely
- Hangers spaced wider than 24 inches
- Debris or standing water in the trough
- Dark staining or peeling paint on the fascia
Probe the fascia for rot
Push a flathead screwdriver into the board every foot or so, especially behind loose sections and near downspouts. Sound wood resists the tip, while rotted wood feels soft and crumbles. Your result tells you what to do next.
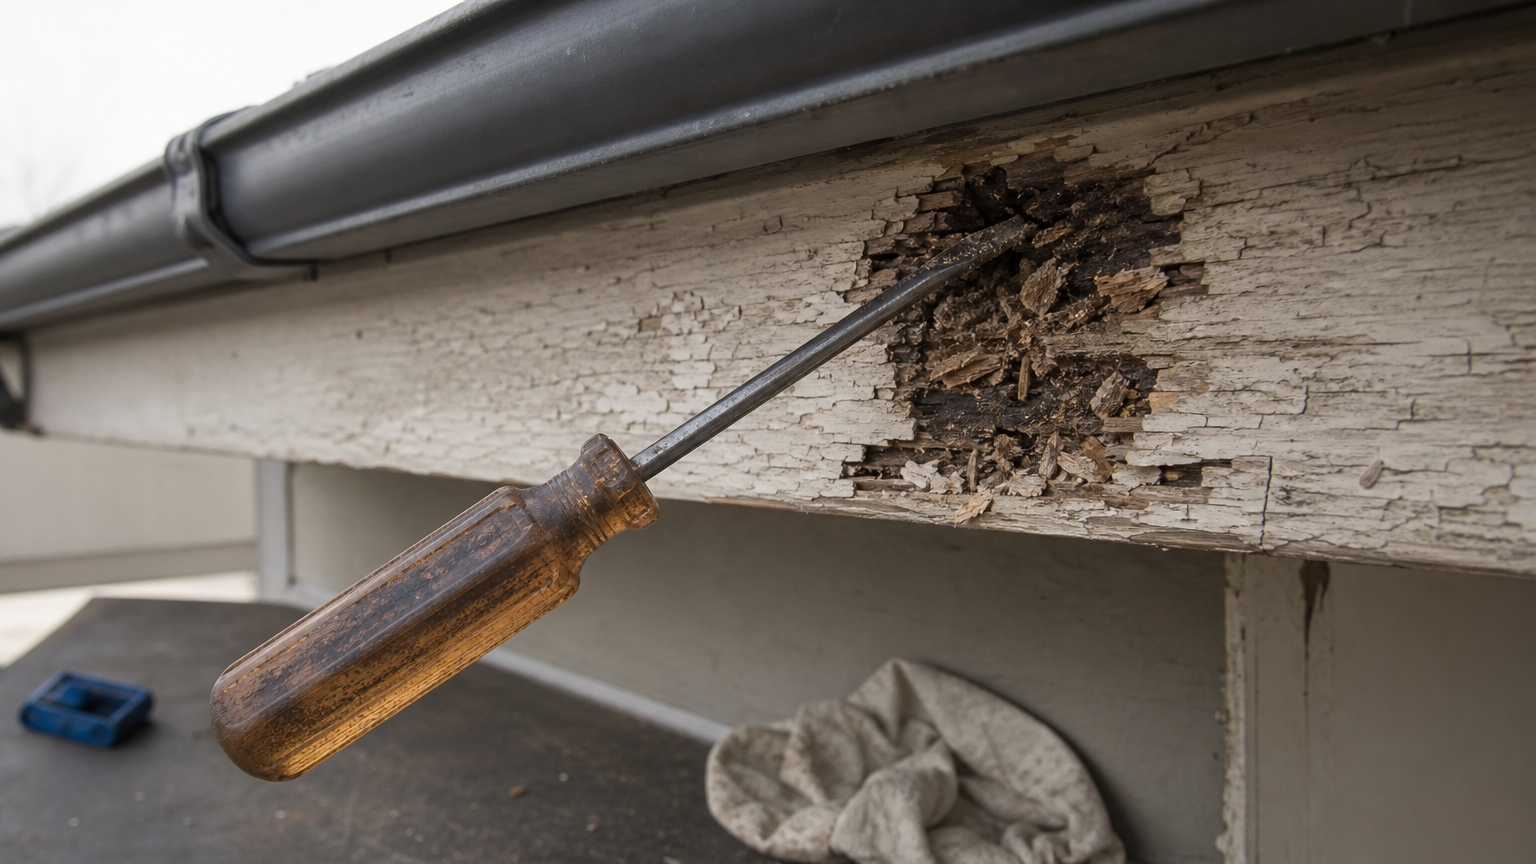
| Screwdriver test | What it means | Next move |
|---|---|---|
| Firm and dry | Sound board | Go on to Step 2 |
| Soft in small spots, under 1/2 inch deep | Minor rot | Dig it out and fill with exterior wood filler |
| Spongy, crumbling, or sinks in deeper | Major rot | Replace the board before rehanging |
If the screwdriver sinks in, the board has to be fixed before the gutter goes back up.
A gutter pulling away from the fascia over rotted wood will never hold, no matter how many screws you drive.
Step 2. Clear the gutter and remove failed fasteners
With the cause identified, you can start the physical work. Empty the trough first, because debris adds weight and hides damaged hardware you need to see.
Clear the debris and flush the run
Scoop out leaves and muck with a hand trowel and drop it in a bucket. Then rinse the run with a hose, working toward the downspout. Check that the downspout drains freely, since a clog there refills the gutter and loads the same fasteners that just failed.
If the gutter is still sagging, have your helper hold it up while you work. Wet muck is heavy, and a gutter that is already loose can twist if you lean on it.
Pull out the old hardware
Remove everything that no longer holds. Leaving bent or half-seated pieces in place can throw off your new alignment.
- Slide a pry bar under each loose spike head and pull it out. Grip stubborn ones with pliers.
- Take out the ferrules, the tube spacers inside the gutter, if your system has them.
- Remove any bent, cracked, or rusted hangers.
- Tap down or pull any nail heads that stick out where the gutter will sit.
- Fill old holes in sound wood with exterior wood filler, then let it cure.
Never drive a new screw into an old hole, because the wood around it has already lost its grip.
When a gutter is pulling away from the house along a long stretch, you will probably find a dozen or more failed fasteners. That is normal. Set the gutter back against the fascia loosely, and move on to rehanging it.
Step 3. Reattach with hidden hangers or screws
Now the gutter goes back on the house. Hidden hangers are my first pick, because they clip onto the gutter’s lip and screw into solid fascia without showing from the ground. Plain fascia screws also work if you are on a tight budget.
Pick your hardware
Each option suits a different situation, so choose by what your gutter and board can handle.
| Hardware | Best for | Spacing |
|---|---|---|
| Hidden hanger with screw | Most aluminum and vinyl gutters | 16 to 24 inches |
| 3-inch exterior screw | Quick fix on sound wood | 16 to 24 inches |
| Strap or bracket | Heavy snow, long runs, copper | 16 inches |
Fasten the gutter in place
Have your helper hold the gutter against the fascia. Then work down the run:
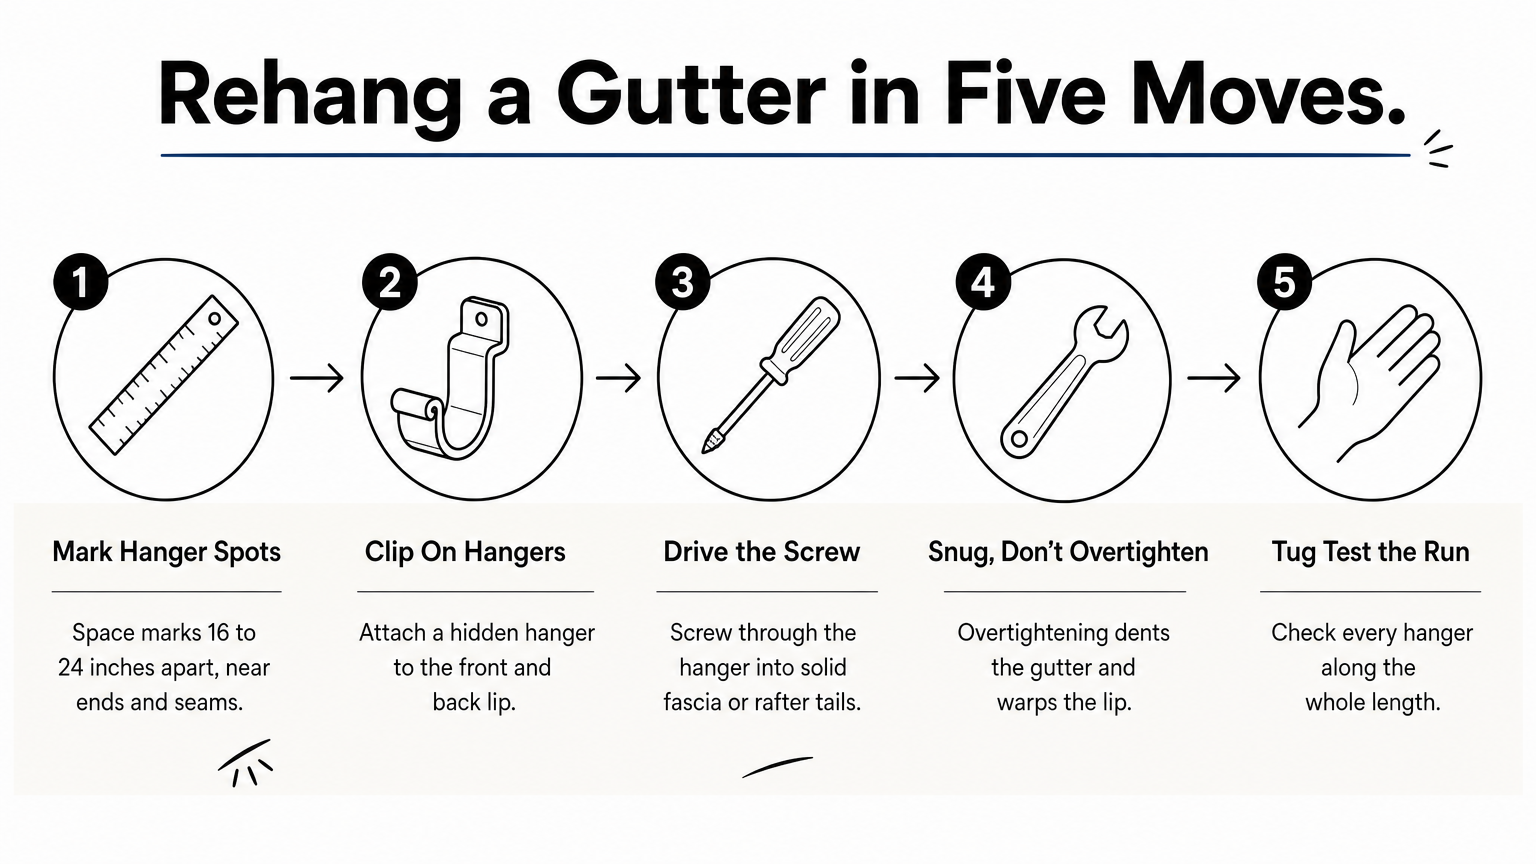
- Mark hanger spots every 16 to 24 inches, with one within 12 inches of each end and each seam.
- Clip a hidden hanger onto the front and back lip of the gutter.
- Drive the screw through the hanger into the fascia. Aim for the rafter tails behind the board when you can find them.
- Tighten until snug. Overtightening can dent the gutter and warp the lip.
- Repeat along the run, then check the whole length.
Every hanger needs to bite into solid wood, or it is only decoration.
If a screw spins freely, the wood is still too soft. Move the hanger over 3 to 4 inches into sound wood, or switch to a longer screw. Repeated spinning means you missed rot in Step 1, so go back and probe again before continuing.
Step 4. Set the pitch and test with a hose
Secure is not the same as finished. A level gutter holds water, and standing water adds weight that loosened your old fasteners. Before you put the ladder away, set the pitch and prove it drains.
Set the slope
Gutters should drop about 1/4 inch for every 10 feet toward the downspout. Hold your 4-foot level on the bottom of the trough and check each section. The bubble should sit just off center, leaning toward the downspout. If it doesn’t, adjust:
- Loosen the screws at the low spot.
- Lift the gutter until the level reads correctly.
- Re-drive the screws into fresh, solid wood a few inches away.
Run the hose test
Next, start the hose at the high end and let it run for a few minutes. Watch the water travel to the downspout and out the bottom. Check the fascia for drips as it flows.
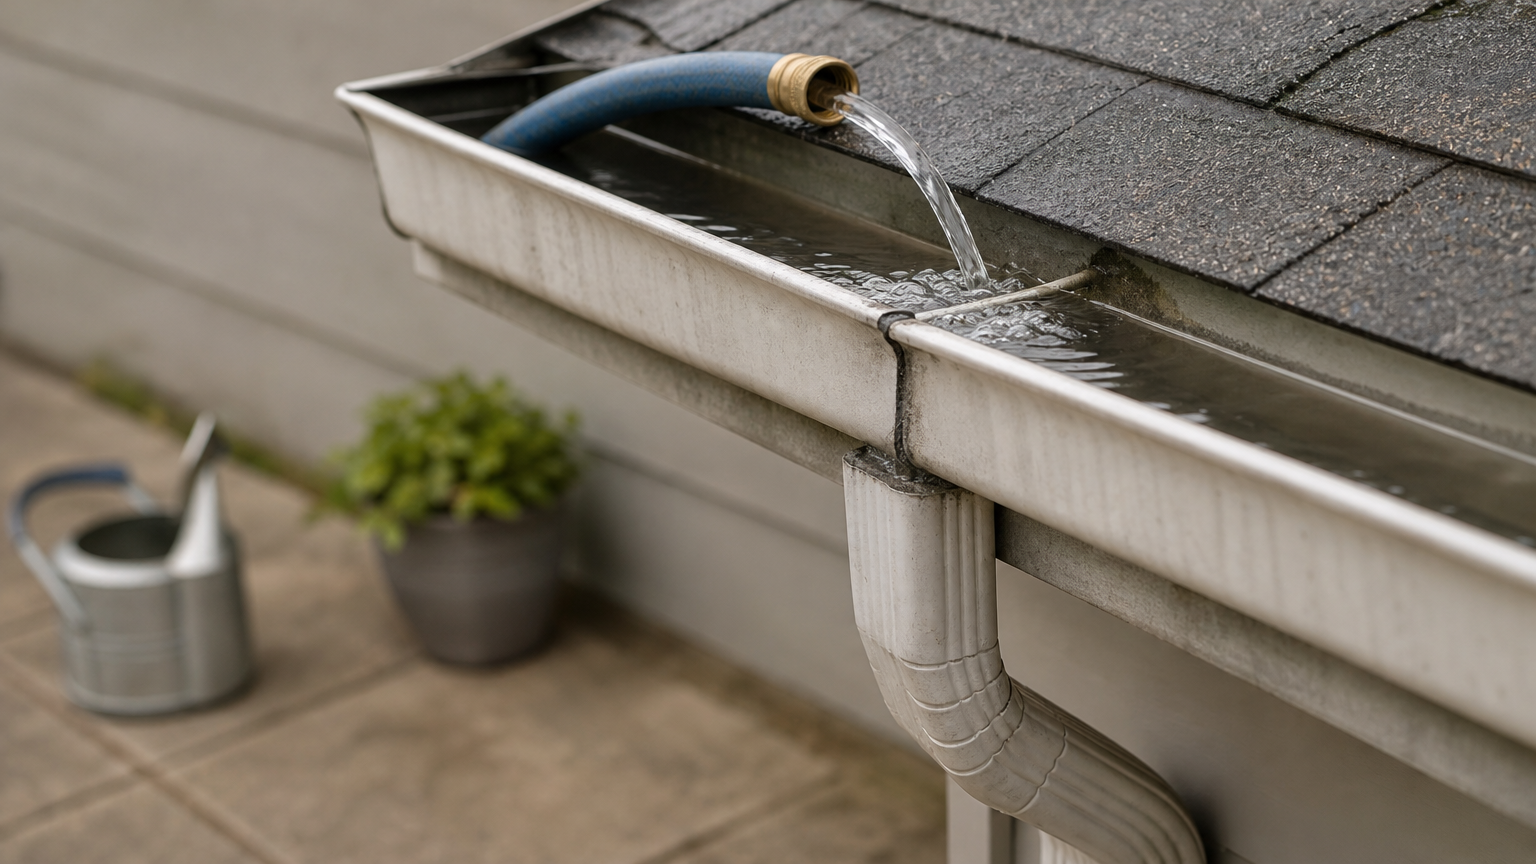
- Pooling water: the spot is too low, so re-pitch it.
- Drips at seams: wipe the joint dry and seal it with gutter sealant.
- Water running behind the gutter: a gap remains against the fascia, so add a hanger there.
A properly pitched gutter drains completely within minutes of the hose shutting off.
Finally, walk the run once more and tug every hanger by hand. Anything that moves gets another screw. That final check is how you fix a gutter pulling away from the house so it stays put.
Keeping your gutters attached for good
Fixing a gutter that is pulling away from the house comes down to four moves: find the cause, clear out the failed hardware, reattach to solid wood, and set the pitch. Skip any one of them and the repair usually fails within a year.
Once the job is done, a little upkeep keeps it done. Clean the gutters twice a year, and tug a few hangers each fall to catch looseness early. Look at the fascia for stains after heavy storms. A five-minute check beats a Saturday of rework.
If the fascia is rotted along a long run, or the gutter sits on a second story, you may not want to tackle it yourself. In that case, get a free gutter repair estimate from a local contractor. It costs nothing to compare their price with your own plan, and you decide what happens next.
What should this cost you?
Answer four questions and get a fair price range for your home.