
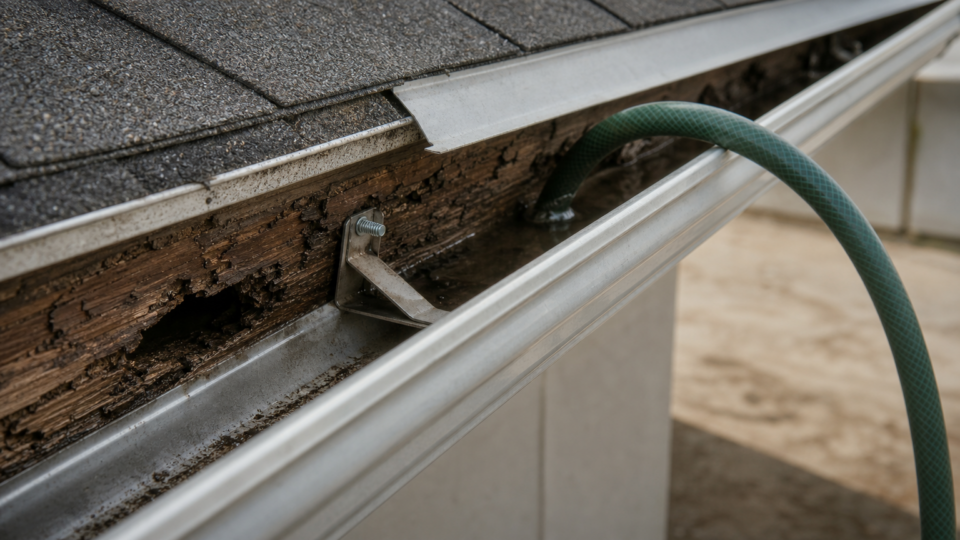
Short answer: To stop water leaking behind gutters, find out where the water leaves its intended path, then fix that one cause. The usual suspects are a clog, a gutter that is out of pitch, loose hangers, or roof runoff curling under the shingle edge because the drip edge or gutter apron is missing or too short. Most of these fixes take an afternoon, a ladder, a garden hose, a drill, and a strip of aluminum flashing. Ready for quotes? Compare local pros →
In this guide
The trouble is that every cause leaves the same evidence. You see a dark streak on the fascia, a damp soffit, or drips running down behind the gutter in steady rain, and the guessing begins. Caulk usually gets blamed first, and it rarely solves anything. Meanwhile the water keeps soaking wood you cannot see, until the fascia softens and the gutter starts to pull away from the house.
This guide explains why water gets behind a gutter, then walks you through four steps: test, clear and re-pitch, fix the roof edge, and recheck. It also tells you when the job belongs to a roofer or gutter pro. The advice comes from installer experience, so it favors repairs that last over quick patches.
Why water runs behind gutters and what it ruins
Water runs behind a gutter when it fails to drop into the gutter, or when the gutter spills toward the wall instead of over the front. Knowing which one is happening keeps you from fixing the wrong thing.
How water gets behind the gutter
Roof runoff does not always fall cleanly off the edge. On low-slope roofs, such as many ranch-style homes with a 3/12 or 4/12 pitch, slow-moving water clings to the underside of the shingles and the metal below them, then follows that surface back toward the fascia. The same thing happens when the shingles stop short of the drip edge, or when the drip edge stops short of the gutter. Overflow is the other route. A clogged or sagging gutter fills up and spills over the back as easily as the front.
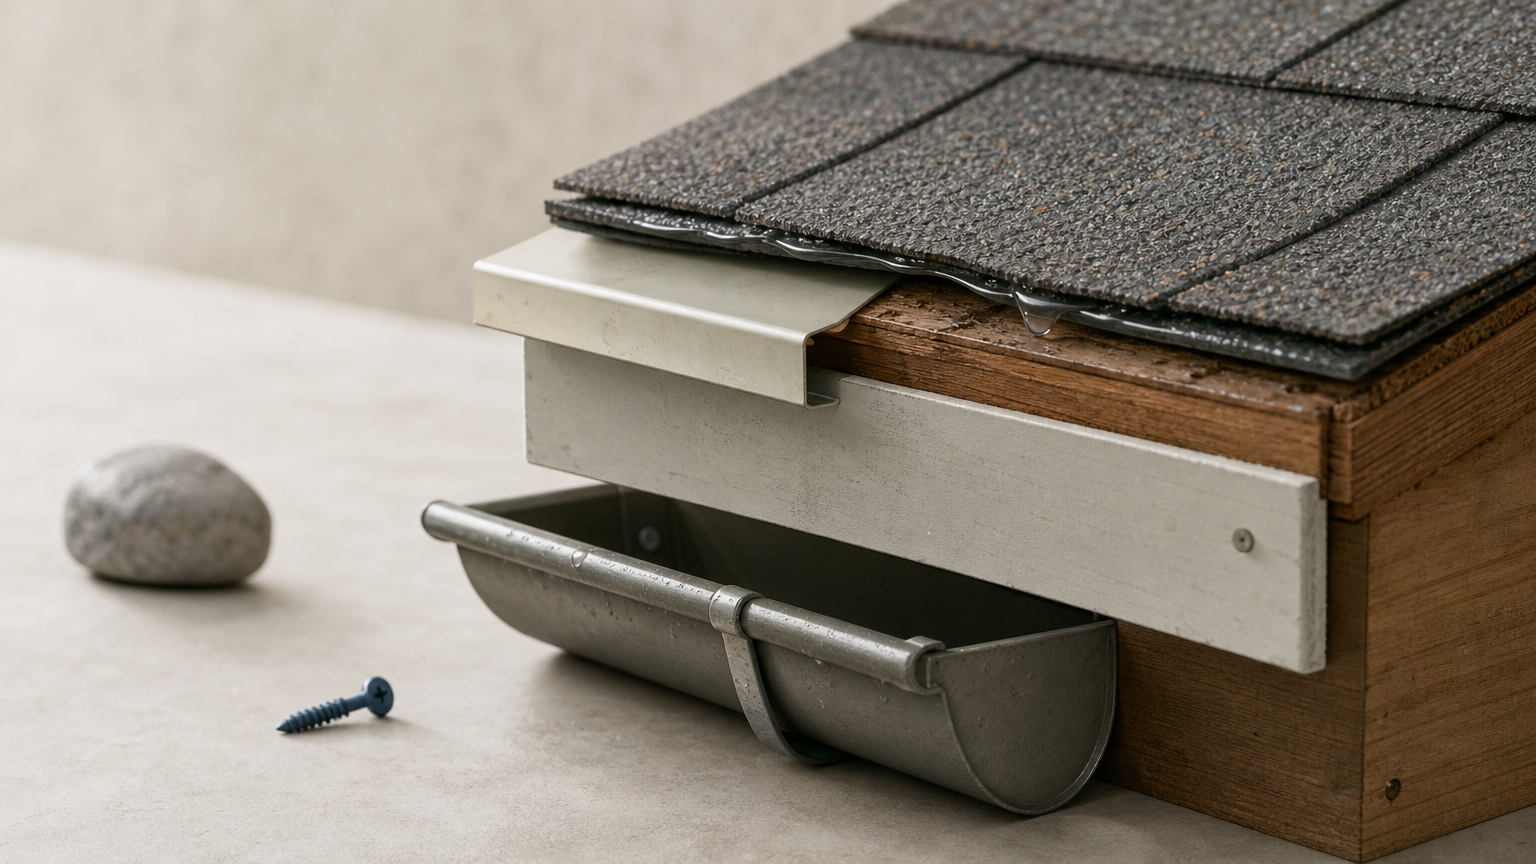
Water follows whatever surface it touches, so the roof edge has to give it a clean place to fall.
What it damages if you wait
Damage starts at the fascia board, the soffit, and the rafter tails behind them. Paint peels and wood softens, hangers lose their grip, and the gutter sags, which makes the leak worse. A bit of spray over the front lip during a cloudburst is normal. A steady trickle down the back is not, and neither is water dripping from the soffit, because that means water has already gotten past the gutter line.
What you need before you start
Gather these before you climb:
- Extension ladder with a stabilizer, and a helper to spot it
- Garden hose with a spray nozzle
- Gloves, a bucket, and a small scoop
- Cordless drill, structural gutter screws, and hidden hangers
- 4-foot level and a chalk line
- Tin snips, aluminum flashing or gutter apron, roofing cement, and exterior primer
Work from the ladder, never from the roof. Skip wet or frosty days and stay well clear of power lines. If your roof is steep or your eaves are above one story, hire a pro for the roof-edge work in Step 3.
What should this cost you?
Answer four questions and get a fair price range for your home.
Step 1. Find out where the water goes
Run a hose test to watch the water move, then match what you see to a cause. Guessing wastes a weekend, and watching takes about twenty minutes.
Run a hose test
Do this on a dry day with a helper below:
- Inspect the dry gutter first. Look for gaps against the fascia, sagging sections, standing water, and debris.
- Run the hose at the high end of the gutter. Water should travel steadily to the downspout without pooling.
- Check the downspouts. Flow should be strong and roughly equal at each one. A weak trickle means a clog.
- Spray the roof edge from low down with a gentle shower, as if it were steady rain. Watch where the water goes at the shingle edge.
Keep the nozzle low and the spray soft. A hard stream aimed up the roof pushes water under shingles and gives you a false leak.
Match the symptom to the cause
Most water leaking behind gutters falls into one of the patterns below.
| What you see | Likely cause | Fix |
|---|---|---|
| Overflow near the downspout, weak downspout flow | Clog | Step 2 |
| Water spills at the end far from the downspout | Gutter out of pitch | Step 2 |
| Gap behind the gutter, sag, or lean | Loose hangers or soft fascia | Step 2 |
| Water clings to the roof edge and runs down the back | Short shingle overhang or short or missing drip edge | Step 3 |
| Drip edge hidden behind the gutter’s back lip | Gutter installed over the drip edge | Step 3 |
If the gutter holds water and drains, the problem is at the roof edge. If it doesn’t, the problem is the gutter.
Some homes have two causes at once, so finish the whole test before you pick up a tool.
Step 2. Clear, re-pitch, and re-secure the gutters
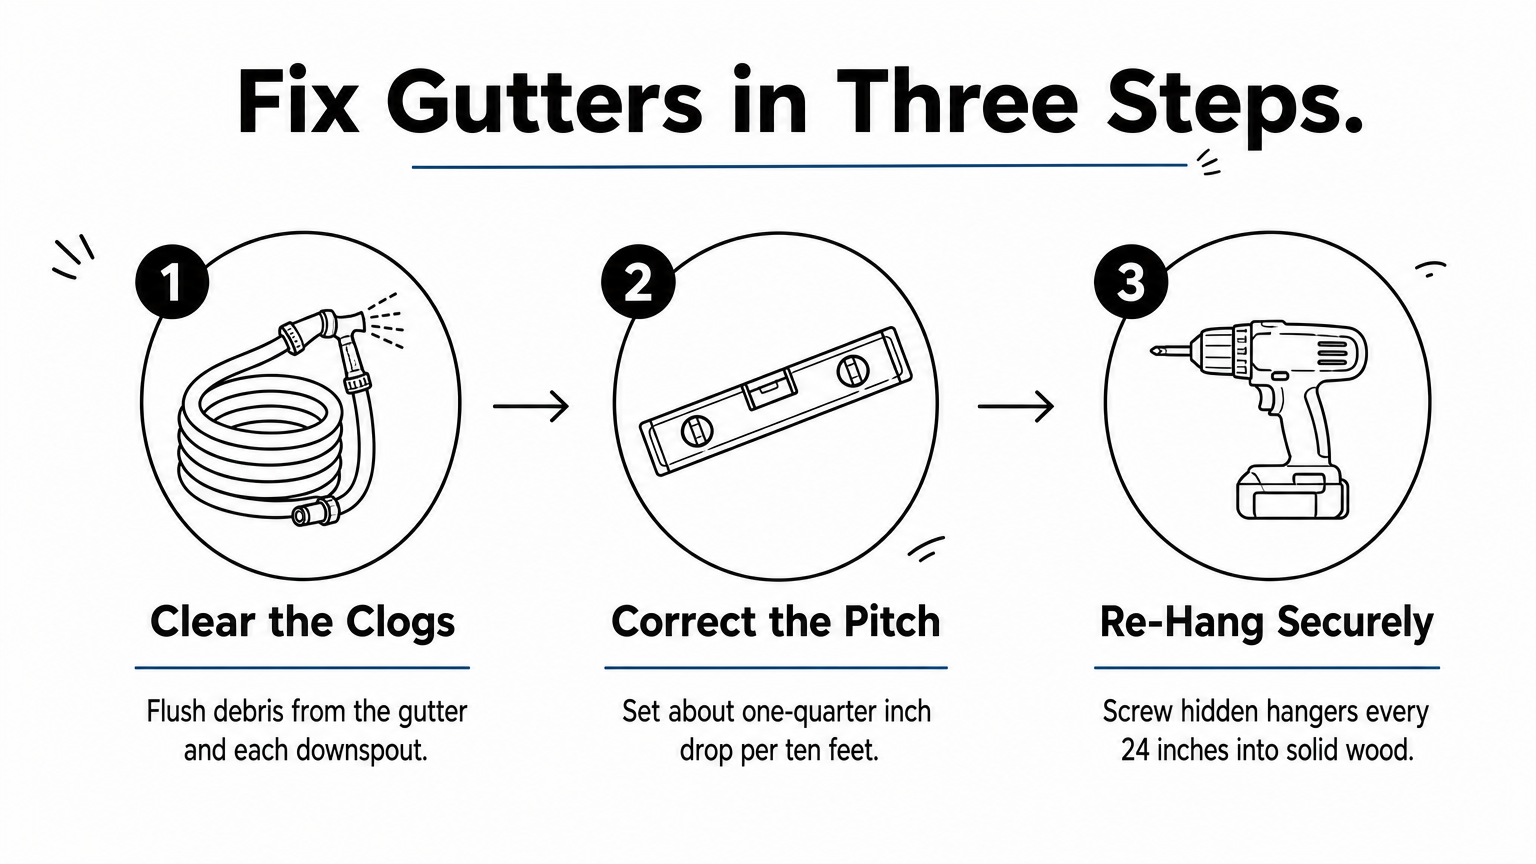
If your test pointed at the gutter, fix it in this order: clear the clogs, correct the slope, then tighten the hanging. Each fix depends on the one before it.
Clean out clogs
Scoop debris by hand into a bucket, then flush the run with the hose. Clear each downspout by flushing it from the top. If water still backs up, push the hose up from the bottom to blast the plug out. A downspout clog is the most common reason gutters leak near the downspout and over the back. If you would rather skip the ladder work, you can hire a pro to clean the gutters.
Fix the pitch
A gutter needs a slight slope toward the downspout, about ¼ inch of drop per 10 feet. Snap a chalk line along the fascia at the correct slope, then compare it to where the gutter actually sits. Pour a bucket of water in and watch for pooling, which shows you the low spots. Re-set the hangers to follow the line. A long run usually works better with a downspout at both ends and the high point in the middle.
Re-hang loose gutters
Old gutter spikes work loose because the nail hole in the wood wears out. Replace them with hidden hangers fastened with screws, spaced about every 24 inches, driven into solid wood. If the screws spin without biting, the fascia is soft. Pull the gutter, cut out the rotten board, and replace it before re-hanging, because new hangers can’t hold in wet wood.
A gutter is only as secure as the board behind it, so test the wood before you trust the hardware.
Step 3. Fix the drip edge and shingle overhang
If the gutter drains well and water still tracks behind it, the roof edge is the problem. Your goal is to make runoff shoot off the shingles and land in the gutter, not cling and creep back.
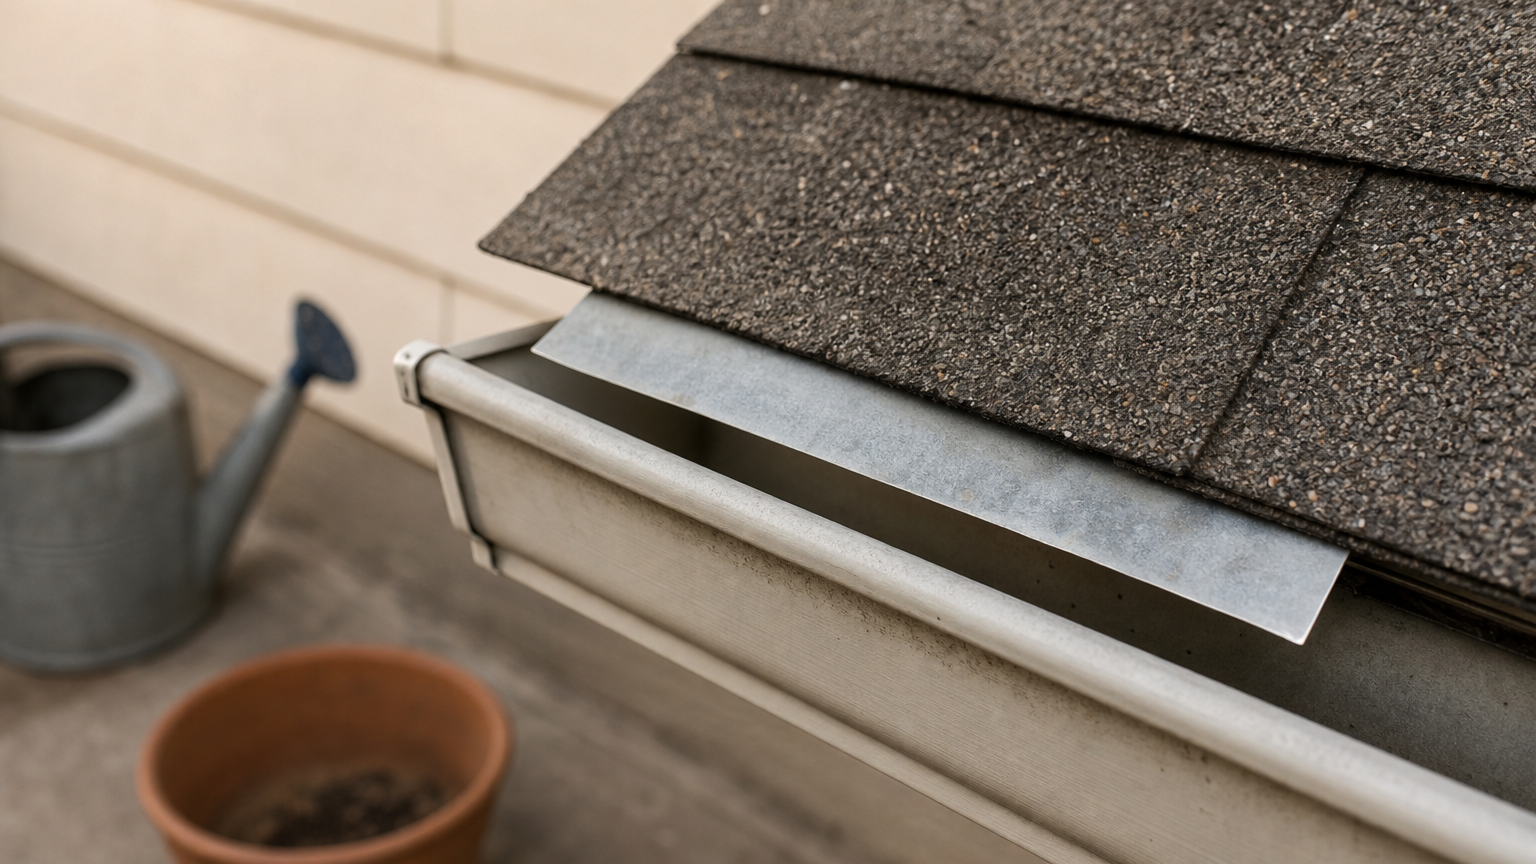
Add a gutter apron or flashing
A gutter apron is a bent strip of metal that tucks under the first shingle course and extends over the back lip of the gutter. It works like an extended drip edge. To add one:
- Pick a mild day, because cold shingles crack when lifted.
- Cut aluminum flashing into 3 to 4 foot pieces.
- Gently lift the bottom shingle course and slide the flashing under it, over the existing drip edge.
- Make the metal reach past the gutter’s back lip so water drops inside.
- Fasten the top edge with short, corrosion-resistant screws or roofing nails, placed where the next course covers them, and dab the heads with roofing cement.
- Overlap pieces by about 2 inches.
Shingles should extend roughly ½ inch past the drip edge, so water falls off instead of wicking back.
Lower a gutter installed over the drip edge
Sometimes the previous installer hung the gutter in front of the drip edge, which tucks the metal behind the gutter and points the water at the fascia. The proper fix is to take the gutter down and re-hang it lower so the drip edge overhangs the back lip. In a pinch, bend a short drip edge outward so water drops into the gutter. This job is easier with two people.
Why caulk alone fails
Roofing sealant along the shingle edge may stop a drip for a season. Sun, heat, and flexing crack it, and the water goes right back to clinging to the edge. Treat sealant as a finishing touch over flashing, never as the fix.
If the leak started right after a new roof, the first course may be set too high or with too little overhang. Call the roofer who did the work, since that is usually theirs to correct.
Step 4. Test the repair and know when to call a pro
Repeat the hose test after your repair, then watch the first real rain. If water drops cleanly into the gutter and the fascia stays dry, you’re done. If any part still runs behind, go back to the table in Step 1.
Retest and finish the wood
Repeat the roof-edge spray with your helper and watch the apron and the back lip closely. Then check the soffit and fascia during the next steady rain. Once the wood has dried for a few days, prime and paint any bare fascia with exterior primer so it is protected again. Drips that continue long after the rain stops are usually water trapped in a sagging section, so recheck your pitch.
Know when it is a pro job
Call a pro when any of these apply:
- Screws pull out of the fascia, or the board crumbles under a screwdriver
- You see water stains on interior ceilings or walls near the eave
- The drip edge is missing along most of the house
- The roof is steep, or the eave is higher than your ladder can safely reach
- The leak started after a recent roof job
Most homeowners policies cover sudden, accidental damage but exclude ongoing leaks and lack of maintenance. Read your policy and call your agent before you assume a claim is covered.
A leak you fix now costs a few hours. A leak you ignore ends up as rotted fascia and rafter repair.
Stop the leak before the wood rots
Water leaking behind gutters comes down to a short list of causes. Clear the clogs, set the pitch, secure the hangers, and give the roof edge a gutter apron or proper drip edge so water drops into the gutter. Then test with a hose and again in real rain.
Do the steps in order and you’ll fix most leaks without replacing anything. If the fascia is soft, the drip edge is missing along the whole house, or the roof is too steep to work on, don’t push your luck. A free estimate for gutter repair shows you what a fair price looks like before you commit to anyone.
What should this cost you?
Answer four questions and get a fair price range for your home.