
Short answer: The right fix for leaking box gutters depends on where the water goes, not on how bad the drip looks. Pinholes and failed joints often respond to sealant, a coating, or a soldered patch. Gutters that leak again every season, or that push water toward the wall, need a full membrane lining or a rebuilt pan. Sealant suits a small repair you can do yourself. Relining suits an owner who wants to fix it once. Replacement suits a gutter that is rotted through or built wrong. Ready for quotes? Compare local pros →
In this guide
Box gutters sit inside the roof edge and are usually built into decorative trim like cornices and crown molding. That hides the damage. By the time you see a stain, the wood behind it may already be soft. Repairs also cost more than ordinary gutter work because of the height, the trim, and the roof tie-in.
This guide first helps you work out which kind of leak you have. Then it ranks five fixes from cheapest to most permanent. It was written by a former gutter installer and reviewed by a home inspector. Prices vary too much by roof and access for one honest national number, so each fix comes with its cost drivers instead.
Why box gutters leak and which kind you have
Box gutters leak in one of three ways: through the pan, over the front edge, or backward into the building. Each has a different cause and a different fix, so confirm which one you have before you buy anything.
The three leak patterns
| Pattern | Typical cause | Warning signs | Urgency |
|---|---|---|---|
| Leak through the pan | Pinholes, rust holes, cracked solder joints, failed drain connection | Drips through the trim even after cleaning, worst near the drain | Moderate, but trim rots over time |
| Spill over the front | Clogged drain or downspout, or rain that overwhelms the outlet | Streaked, bubbled paint on the trim below | Low to moderate, fix drainage first |
| Water runs behind the gutter | Front edge higher than the back, so overflow goes into the building | Ceiling stains in the wall corner, white salts on brick, peeling interior paint | High |
The third pattern is the one to take seriously. In many older buildings the rafter and joist ends rest in pockets in a masonry wall. A gutter that feeds water into that wall for years can rot them. Stains farther into the room usually point to the roof, not the box gutter.
A box gutter that leaks backward is a building problem, not a gutter problem.
A quick test to confirm the pattern
Timing is your best clue. A drip in light rain usually comes from the pan. A leak that appears only in downpours means the gutter fills and spills. A hose test settles it:
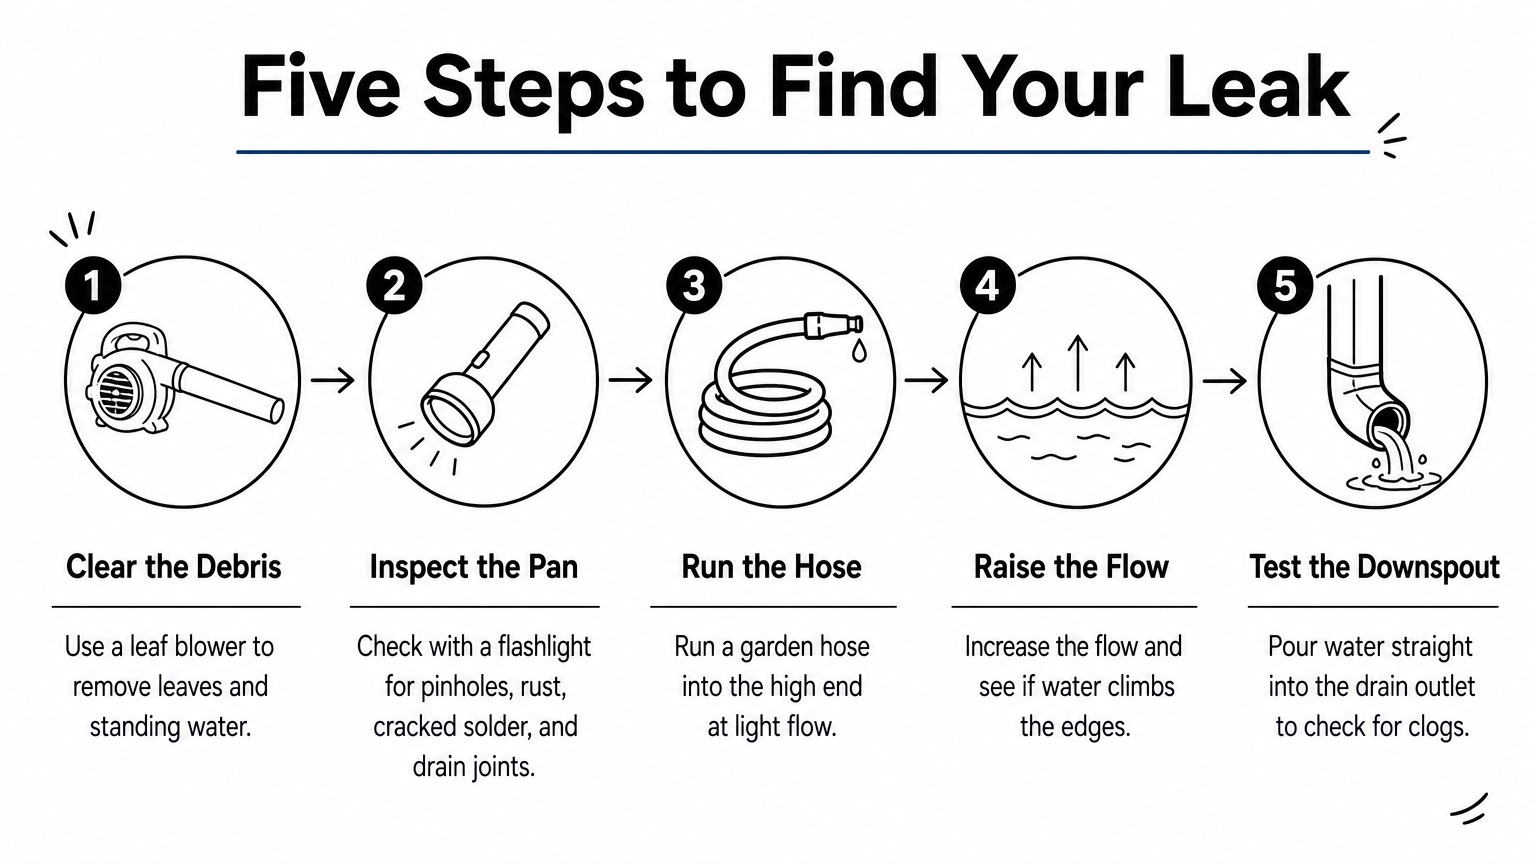
- Clear debris and standing water. A leaf blower is the fastest way.
- Check the pan with a flashlight for pinholes, rust, cracked solder and the drain connection.
- Run a garden hose into the high end at a light flow while a helper watches the trim and ceiling inside.
- Raise the flow and watch whether water leaves through the drain or climbs toward the edges.
- Send water straight down the drain outlet to test the downspout for a clog.
Anything above one story is a job for a pro with proper access. Ladders and wet metal are a bad mix.
Which fix matches which leak
| Pattern | Start with | Permanent answer |
|---|---|---|
| Through the pan | Fixes 1 to 3 | Fix 4, relining |
| Over the front | Clear the drain and downspout | Fix 4 or 5, with better drainage designed in |
| Behind the gutter | Nothing temporary works | Fix 4 or 5, with the heights corrected |
What should this cost you?
Answer four questions and get a fair price range for your home.
1. Sealant and patch tape for small leaks
Sealant and patch tape are the cheapest fix, and they only work on small, isolated leaks in a gutter that drains correctly.
How it works and who it suits
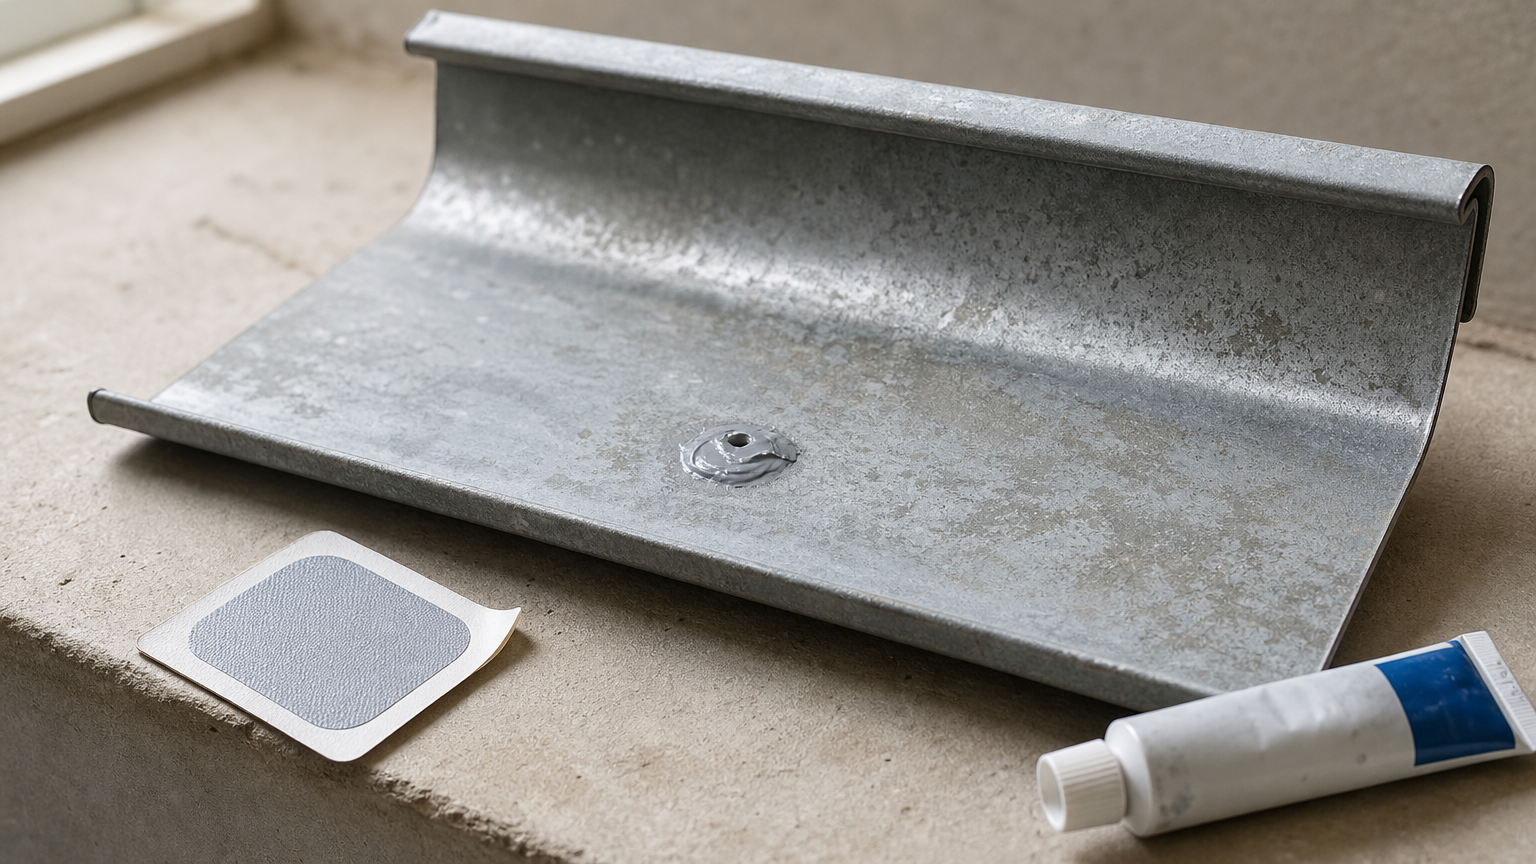
Wire-brush the spot, wipe it clean, let it dry completely, then apply a sealant rated for constant water exposure over the pinhole or seam. Peel-and-stick patches go on the same way and need firm pressure. This suits a few pinholes or one weeping seam when you want to stop the drip until dry weather.
It does not suit a gutter that backs up or spills toward the wall, because caulk cannot change where the water goes. Peel-and-stick tape is the weakest choice in a pan that holds water. The adhesive loses grip when wet, and moisture trapped underneath keeps rusting the metal out of sight.
Sealant stops a pinhole. It cannot fix a gutter that drains the wrong way.
Cost and how long it lasts
Expect a hardware store trip and an afternoon of work. Durability is the catch, because metal expands and contracts and the sealant eventually pulls away.
- Cost: lowest of the five, DIY friendly
- Lifespan: months to a couple of seasons, depending on how much water stands
- Best use: a stopgap while you plan a real repair
2. Liquid coatings and reinforced membranes
A brush-on or roll-on coating seals a pan with many small leaks, provided the metal underneath is still sound.
How it works and who it suits
The coating forms a seamless rubbery layer over the cleaned pan. Joints and corners are often reinforced with fabric or fiberglass mat embedded in the coating. It suits a metal pan with widespread pinholes but no major rot, and a homeowner willing to do careful prep. It does not suit a pan that is perforated or flaking in sheets. New coating cannot bond to metal that is crumbling.
Prep is the whole job. Remove rust, clean the pan, and let it dry. Skipping this is why most coatings fail early. Carrying heavy buckets up a ladder is also harder than it sounds.
A coating is only as good as the prep underneath it.
Cost and how long it lasts
Materials are modest and the labor is mostly cleaning. Plain coatings in a pan that holds water often need redoing within a year or two, because they flex with the metal. Fabric-reinforced seams last longer, but not indefinitely.
- Cost: low to moderate
- Lifespan: short to medium, shorter where water stands
- Best use: sound metal with many tiny leaks, and a tight budget
3. Soldering or replacing sections of the metal pan
If your pan is copper or another solderable metal, a sheet metal worker can solder pinholes, redo cracked joints, or cut out and replace a rusted section.
How it works and who it suits
Joints crack because the metal moves with temperature, and the drain connection is a common weak point. A skilled worker reflows the solder or cuts in a new piece of metal. This suits historic homes with a good copper or metal pan that has failed only in spots, especially where the owner wants to keep the original material.
The limit is the labor pool. Experienced tinsmiths are scarce, so expect to call several shops. Spot repair also does nothing for a gutter whose front edge is too high.
Repairing the metal is worth it only when the metal is still worth keeping.
Cost and how long it lasts
Most of the price is labor, with access equipment on top. Bundle other high work, such as chimney caps or painting, while the lift or scaffolding is already there.
- Cost: moderate, charged by the section
- Lifespan: long if the rest of the pan is sound
- Best use: localized failures in good metal
4. Relining the box gutter with a membrane
Relining lays a waterproof single-ply membrane over the whole pan, and it is the most common permanent fix for leaking box gutters.
How it works and who it suits
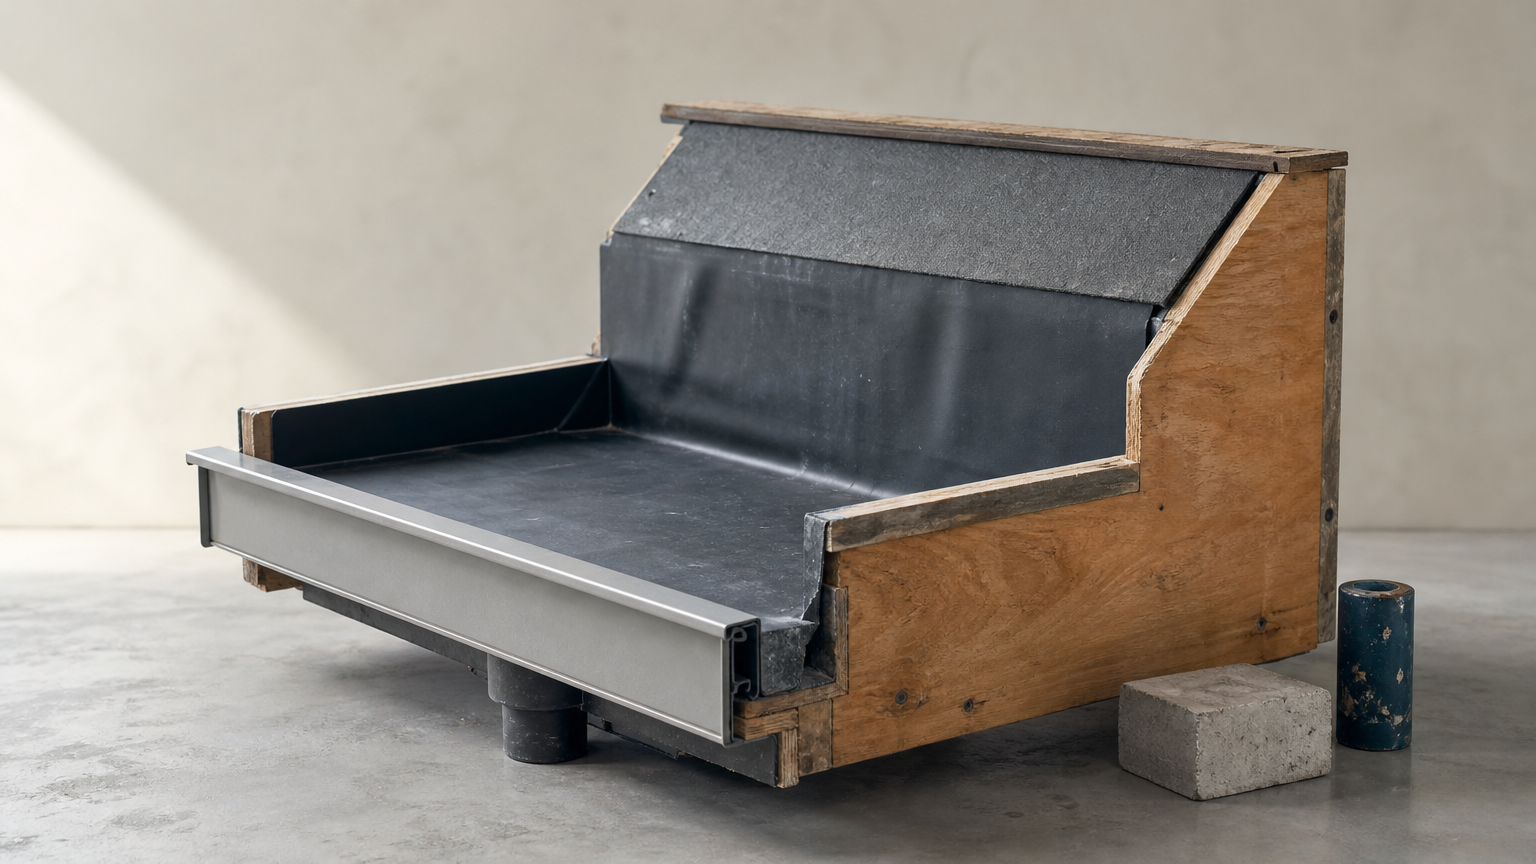
The installer cleans the pan, repairs any rotted wood, fits the membrane, and seals the drain. The membrane also runs up the roof behind the gutter, about 6 to 12 inches depending on pitch, and ties in under the roofing. That stops backward overflow. A trim cover over the face makes water drip clear of the decorative trim. Relining suits any owner whose gutter leaks repeatedly, but the structure must still be sound.
The three common membranes behave differently, based on what installers who line box gutters commonly report:
| Membrane | Seams | Flexibility | Drain and corner parts | Watch for |
|---|---|---|---|---|
| EPDM rubber | Glued or taped | Very flexible | Drain area usually field-made | Not fabric reinforced, tears more easily, glued seams can degrade in standing water |
| TPO | Hot-air welded | Stiff, hard to shape in tight gutters | Limited accessories | Drain area can be vulnerable, needs a welder |
| PVC | Hot-air welded | Flexible, fabric reinforced | Most accessories, including drain boots and corners | Needs an experienced installer with a welder |
PVC is a common pick for complex shapes because of the prefabricated parts. Even so, a careful EPDM or TPO job beats a sloppy PVC one, so ask your contractor why they use what they use.
The seams and the roof tie-in decide whether a reline lasts, not the brand of membrane.
Cost and how long it lasts
There is no honest single price for relining. Material is a small share, and labor and setup are the bulk. Three things drive your quote:
- Tie-in: shingle roofs are the easiest, while slate and metal roofs take far more time.
- Height and access: tall, tight lots need lifts or scaffolding.
- Length and shape: more linear feet and more corners mean more labor.
Get at least two written quotes that name the membrane, the seam method, the roof tie-in height, and the drain parts. Lifespan is typically the longest of the repair options when welded seams and a proper tie-in are done.
5. Replacing or rebuilding the box gutter
Replacement is the right call when the structure under the gutter has failed or the gutter was built wrong, and it is the most expensive fix.
How it works and who it suits
A rebuild strips the pan, repairs decking and framing, and installs new metal or a new lined pan with the correct slope and heights. Sometimes the front is lowered or the back raised so overflow goes out, not in. In some buildings an exterior hanging gutter can replace the box, but that changes the look and may need approval in a historic district.
Replacement suits rotted substrate, damaged rafter ends, repeated failed repairs, or a front edge higher than the back that a liner cannot fix. If your home was built before 1978, test painted trim for lead before anyone scrapes or sands it.
Replace when the structure under the gutter is the problem, not the gutter.
Cost and how long it lasts
Cost is the highest of the five. It includes carpentry, custom trim repair, roof tie-in, and access equipment, and it varies widely by building. In return you get a reset: a correctly built gutter should outlast any patch. Compare bids on scope, because a low bid that skips carpentry usually reappears as a leak.
- Cost: highest, driven by carpentry and trim
- Lifespan: longest
- Best use: rot, structural damage, or a faulty design
Choosing a fix and getting a quote
Match the fix to the leak. Sealant, coatings, and soldered patches suit small leaks in a gutter that drains correctly. Relining suits a gutter that keeps failing, and replacement suits rot or a faulty build. A leak that runs into the wall should never wait.
Before you commit, run the hose test, photograph the damage, and get written quotes that spell out the materials and roof tie-in. If you want a contractor’s price for your own gutter, you can request a free gutter repair estimate and compare it against the cost drivers above.
What should this cost you?
Answer four questions and get a fair price range for your home.