
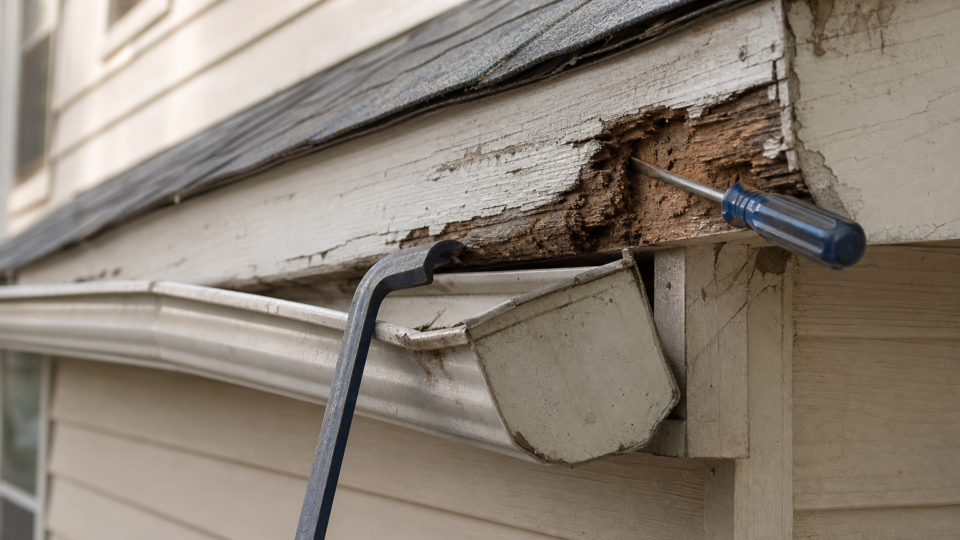
Short answer: If your gutters are sagging away from the roofline or you spot soft, discolored wood behind them, you’re dealing with a fascia problem, not just a gutter problem. Fascia and gutter repair almost always go together, because the fascia board is what your gutters are actually screwed into. Once that wood rots or pulls loose, the gutters have nothing solid to hang on, and water starts finding its way into your roof deck and siding instead of your downspouts. Ready for quotes? Compare local pros →
In this guide
This guide walks you through gutter fascia repair the way a former installer would tackle it: identifying whether you’re looking at a spot repair or a full board replacement, what tools and materials the job actually requires, and roughly what it should cost whether you DIY it or hire a pro.
We’ll cover diagnosing the damage, removing damaged fascia and gutter sections safely, replacing rotted wood with the right material, and reattaching gutters so they hold up through the next storm season. By the end, you’ll know exactly what your repair involves and what a fair price looks like before you call anyone for quotes.
Assessing fascia and gutter damage before you start
Before you climb a ladder, figure out what you’re actually dealing with. Fascia and gutter repair jobs fall into two very different categories: a quick spot fix on a few feet of soft wood, or a full teardown where rot has spread along an entire run. Grabbing a screwdriver and poking at the wood behind your gutters for five minutes will tell you more than any online guide, because rot severity changes what tools, materials, and skill level the job needs.
Reading the damage correctly
Don’t assume every sagging gutter means rotted fascia. Sometimes it’s just loose hangers or a clogged downspout adding weight from standing water. Look for these specific signs before you commit to a repair plan:
- Soft or spongy wood when you press a screwdriver into the fascia, especially near seams and corners
- Dark staining or peeling paint on the fascia board or the soffit just below it
- Visible daylight between the gutter and the fascia when viewed from a ladder
- Gutter spikes or hangers pulling straight out of the wood with little resistance
- Sagging sections that hold water instead of draining toward the downspout
If you find soft wood in more than one spot along a run, you’re likely looking at a full board replacement rather than a patch.
If a screwdriver sinks into the fascia without resistance, you’re replacing wood, not just gutters.
Matching the repair to the damage
Once you know what you’re facing, match it to the right scope of work. Small, isolated soft spots near a single hanger can often be sistered with a wood filler or a short splice board. Widespread rot, especially where you can see through the fascia or where insects have hollowed it out, calls for full-length replacement.
| Damage level | What you’ll see | Typical fix |
|---|---|---|
| Minor | Small soft spot, no daylight through wood | Epoxy filler or short spliced patch |
| Moderate | Soft wood 2-4 feet, some staining | Cut-out and replace section |
| Severe | Crumbling wood, insect damage, sagging gutter run | Full fascia board replacement |
Questioning the extent of the damage now saves you from reopening the same repair next season.
DIY or call a pro
Roughly gauge your comfort with ladder work and carpentry before deciding. Spot repairs on a single-story home with accessible eaves are reasonable DIY territory if you’re comfortable on a ladder and have basic tools. Full fascia replacement on a two-story home, or any job involving structural rot in the roof deck itself, is worth handing to a licensed contractor. Structural rot that’s spread into the rafter tails is a different job entirely and usually needs a carpenter, not just a gutter installer.
Sizing up cost expectations early also helps you avoid surprises. Recognizing whether you’re in for a $150 patch or a $2,000+ full replacement changes how you plan the project and whether it’s worth pulling multiple quotes, and it helps to see what replacing gutters, soffit, and fascia together runs. Our cost estimator tool can give you a realistic price range based on your linear footage, material, and region before you start buying supplies or calling contractors, and our 2026 breakdown of what homeowners really pay to replace gutters covers the bigger jobs.
Setting realistic expectations at this stage means the rest of this guide will actually match the job in front of you, whether that’s an afternoon patch or a weekend teardown.
What should this cost you?
Answer four questions and get a fair price range for your home.
Step 1. Inspect the fascia and gutters for damage
Grab a few basic tools before you climb anything: a sturdy ladder, a flashlight, a flathead screwdriver or awl, and your phone camera. Gutter fascia repair starts with a proper inspection, not a guess from the ground. Walk the perimeter of your house first and look up at the fascia line from a distance, since sagging sections and dark streaks are often easier to spot from 20 feet away than from the top of a ladder.
Grab the right tools first
Having the right gear on hand keeps the inspection safe and thorough instead of rushed. Set up before you climb:
- Ladder stabilizer or standoff to keep the ladder off the gutter itself
- Flathead screwdriver or awl for probing soft wood
- Flashlight for checking under the gutter and behind fascia trim
- Phone camera for documenting rot, staining, and gaps
- Work gloves since old fascia edges and gutter debris are often sharp
Walk the roofline systematically
Move the ladder every 4 to 6 feet rather than trying to reach across a long span, and probe the fascia at each hanger location, since that’s where water intrusion and hardware stress concentrate first. Push the screwdriver into the wood at a slight angle. Solid fascia resists and barely dents. Rotted fascia lets the tip sink in with almost no pressure.
A few minutes with a screwdriver at each hanger tells you more than staring at the gutter from the ground ever will.
Check the gutter itself while you’re up there too. Look for standing water, separated seams, and spikes that wiggle loose in their holes. Fascia and gutter repair decisions hinge on whether the hardware failed because of loose fasteners or because the wood underneath gave out, and you can only tell the difference by touching it directly.
Document what you find
Photograph every problem area as you go, including a wide shot for context and a close-up of the damage. Note the linear footage of soft or discolored fascia, and mark whether it’s isolated to one section or continuous along the run. This record becomes useful later, whether you’re ordering matching material yourself or getting quotes, since contractors price jobs faster and more accurately when they can see exactly what they’re bidding on instead of guessing from a phone description.
Step 2. Remove the damaged gutter and fascia board
Once you know where the rot is, get the gutter out of the way before you touch the fascia. Trying to pry off a rotted board with the gutter still hanging on it usually ends with bent aluminum and a bigger mess than you started with. Gutter fascia repair goes faster and cleaner when you separate the two systems and work on them one at a time.
Detach the gutter section
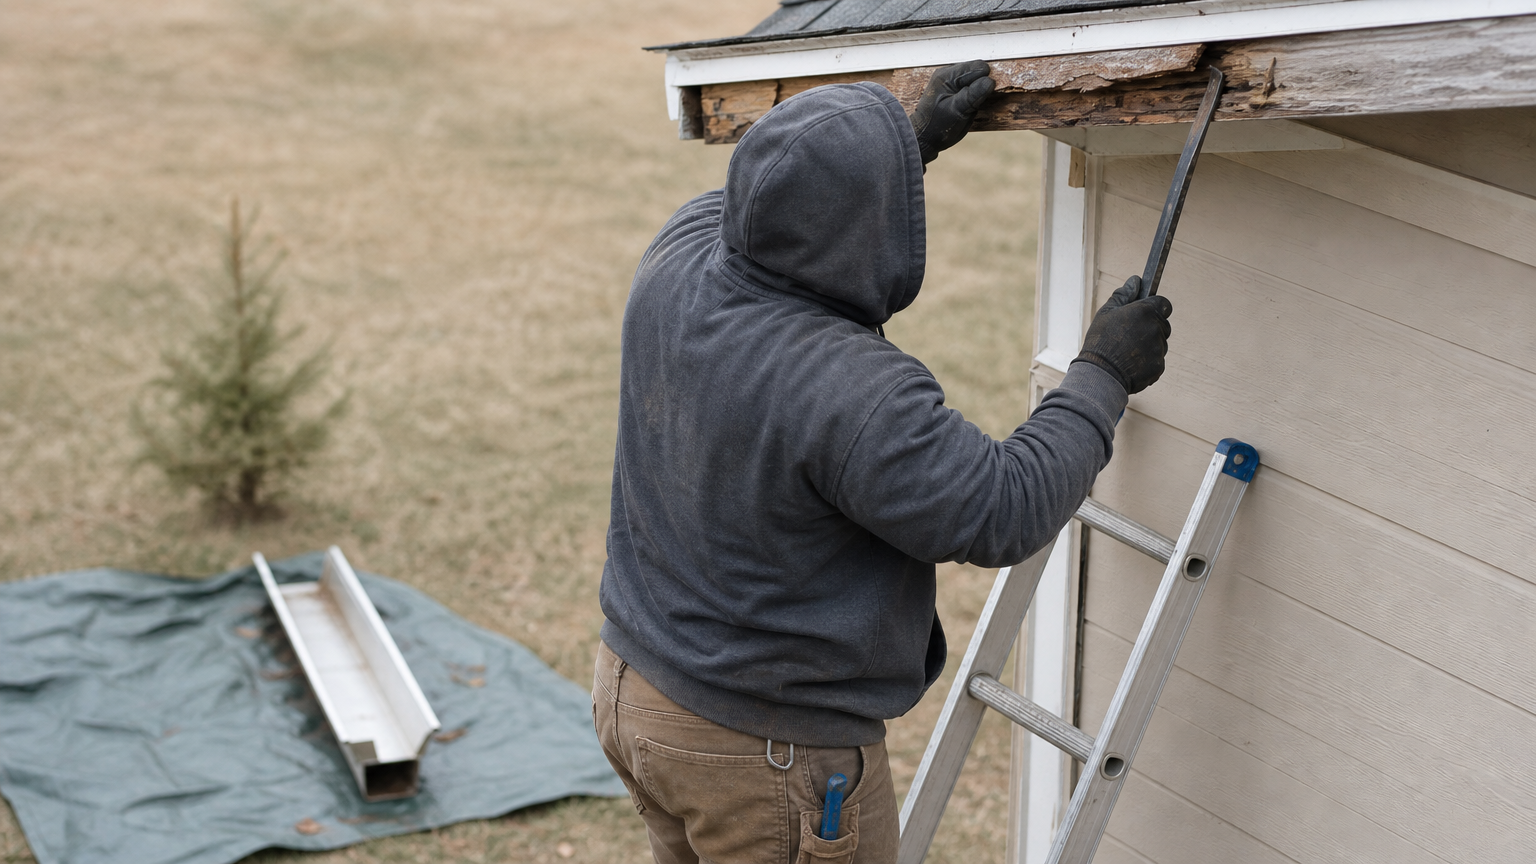
Start by supporting the gutter so it doesn’t drop once you pull the fasteners. Have a helper hold it or prop it with a 2×4 against the wall if you’re working alone.
- Remove hangers and spikes along the damaged section using a flat bar or drill, working from one end to the other
- Disconnect end caps or seams if the damage spans a joint, so you’re not fighting a rigid run
- Lower the gutter section carefully and set it aside on a tarp, away from foot traffic
- Check the gutter itself for dents or splits while it’s on the ground, since you may be able to reuse it once the fascia is fixed
Pull the gutter before you touch the fascia. Working on both at once is how good aluminum gets bent for no reason.
Pull the damaged fascia board
With the gutter clear, look at how the fascia is attached. Most boards are face-nailed into the rafter tails, sometimes with a few screws added by a previous repair. Slide a flat pry bar behind the board near a nail and work it loose in short sections rather than yanking the whole length at once, since brittle rotted wood snaps unpredictably and can pull chunks of soffit down with it.
Remove nails as you go instead of leaving them in the rafter tails. Loose nails left in place snag your hands later and make it harder to seat new fasteners cleanly. If the fascia is one continuous board running past your repair zone, cut it at a rafter with a circular saw set to the board’s thickness so your patch has a clean, supported edge to butt against, rather than an unsupported overhang.
Before you set the old board aside, hold it up next to a tape measure and note the exact width, thickness, and profile. Fascia boards come in a few standard sizes, and matching yours saves you a return trip to the lumberyard once you’re ready to cut replacement stock in the next step.
Step 3. Repair or replace the rotted fascia
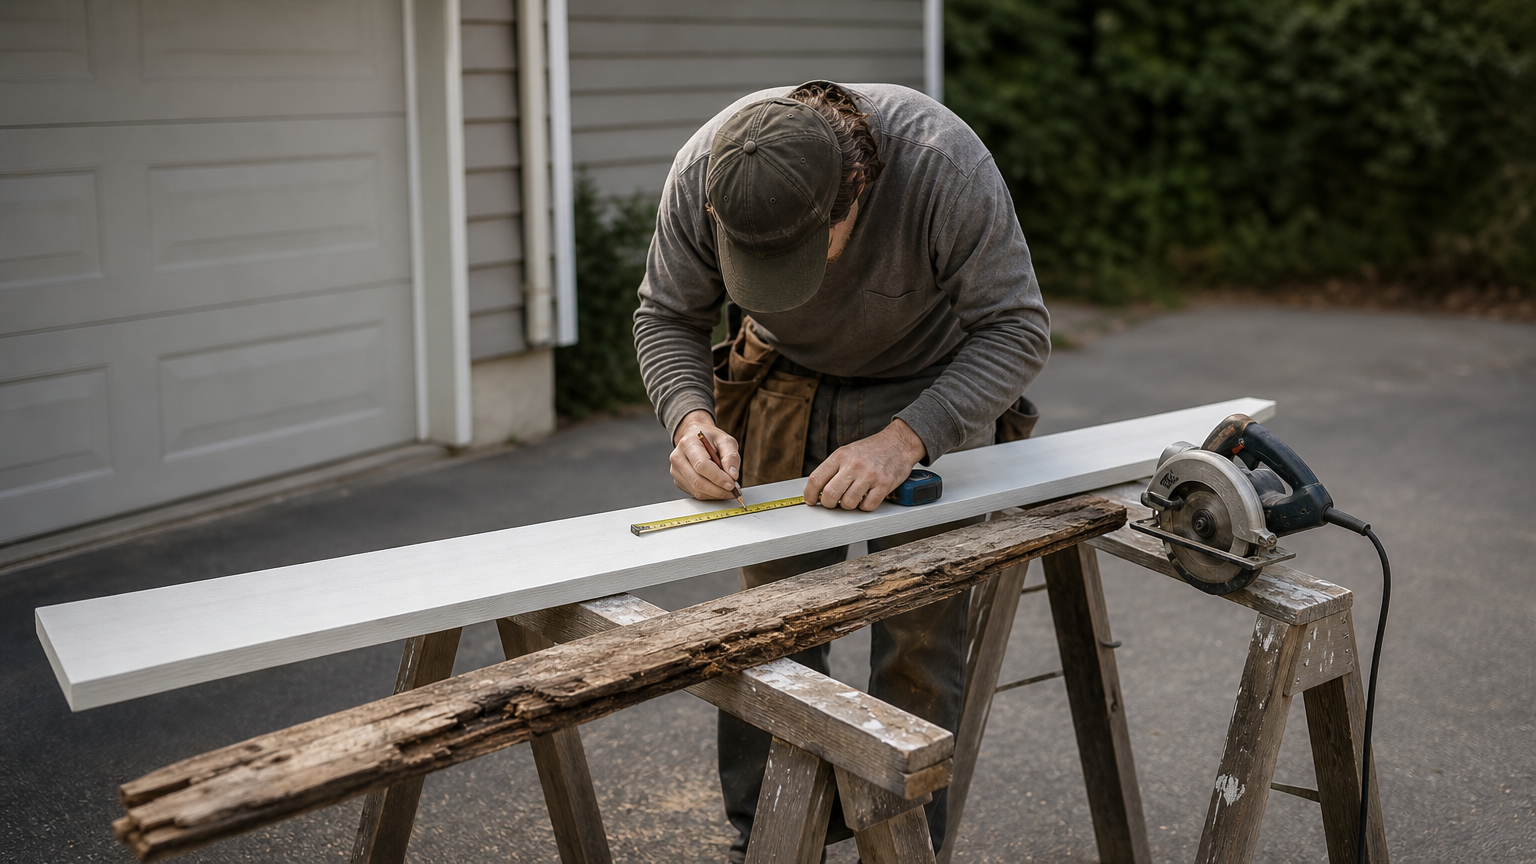
With the old board out, decide whether you’re patching a short section or replacing the whole run. Fascia and gutter repair at this stage is really a carpentry job, so measure twice before you cut anything, and always cut new stock a hair long so you can trim to a tight fit rather than fight a gap.
Choose the right material
Matching material to your climate matters more than matching it to what was there before, since the original board is the reason you’re doing this repair in the first place. Primed pine is the cheapest option and works fine in dry climates, but it’s the material most likely to rot again if your gutters ever overflow. Cellular PVC and fiber cement cost more upfront but shrug off moisture indefinitely.
| Material | Approx. cost per linear ft | Rot resistance | Notes |
|---|---|---|---|
| Primed pine | $2-$4 | Low | Needs paint maintenance every few years |
| Cedar | $4-$7 | Moderate | Natural oils resist rot, but still needs sealing |
| Cellular PVC | $6-$10 | High | Won’t rot, holds paint well, easy to cut |
| Fiber cement | $5-$9 | High | Very durable, heavier to handle |
Spending a little more on PVC or fiber cement now usually costs less than redoing the same repair in five years.
Cut, fit, and fasten the new board
Transfer the width, thickness, and profile you measured earlier onto the new stock, then cut it with a circular saw for straight runs or a jigsaw for corners. Dry-fit the piece before fastening anything, checking that it sits flush against the rafter tails with no gaps at the top or bottom edge.
- Pre-drill fastener holes near the board’s edges to prevent splitting, especially with PVC
- Use galvanized or stainless nails or screws driven into every rafter tail, not just the ends
- Leave a small gap at butt joints for seasonal expansion, roughly 1/8 inch
- Caulk all seams and end grain with an exterior-grade sealant before painting
Once the board is solidly fastened and sealed at every joint, prime and paint it if you went with pine or cedar. PVC and fiber cement can often skip priming, but check the manufacturer’s spec sheet first, since some finishes still call for it to hold the warranty.
Step 4. Reinstall the gutters and seal the repair
Now that the fascia is solid again, get the gutters back up while the board is still bare and easy to access. Fascia and gutter repair finishes here, and this step is where a lot of DIY jobs go wrong, because rushing the reattachment undoes the careful carpentry you just did. Take the time to set proper pitch and seal every joint before you call the job done.
Rehang the gutter with correct pitch
Gutters need a slight slope toward the downspout, roughly a quarter inch of drop for every 10 feet of run, or water sits and pools instead of draining. Snap a chalk line along the new fascia to mark that slope before you start driving fasteners, since eyeballing it almost always ends up either too flat or tilted the wrong way.
- Reinstall hangers every 24 to 36 inches, spacing them tighter in regions with heavy snow or ice
- Drive screws into solid wood, never just into the gutter lip, since that’s what failed last time
- Reconnect end caps and seams with gutter sealant before final fastening, not after
- Reuse the old gutter section only if it came off undamaged during removal in Step 2
A gutter hung level instead of pitched will fail again no matter how good the fascia repair underneath it is.
Seal every joint and test it
Apply a bead of exterior-grade gutter sealant along every seam, end cap, and the spot where the gutter meets the fascia itself. Skipping this step is how water sneaks behind the new board and starts the same rot cycle over again in a year or two. Run a hose down the section once everything’s fastened and watch where the water goes. It should move steadily toward the downspout with no drips at the seams and no pooling anywhere along the run.
Do a final walkthrough
Step back and check the whole repair from the ground and from the ladder before you pack up. Confirm the paint or sealant has cured according to the product label, check that downspouts are clear and draining away from the foundation, and photograph the finished work for your records. Pay attention to any spots where the new fascia meets old, unrepaired sections, since that transition is worth revisiting during your next seasonal cleaning to catch new problems early.
Keeping your roofline in good shape
Getting this right the first time comes down to matching the fix to the actual damage, not just the symptom you noticed from the driveway. Fascia and gutter repair done properly means solid wood behind every hanger, correct pitch, and sealed joints that keep water moving toward the downspout instead of into your soffit. Skip any of those steps and you’ll be back on the ladder next season, probably dealing with a bigger patch than the one you just finished.
Most homeowners can handle a single spot repair on a one-story eave with basic tools and a free Saturday. Widespread rot, structural damage to rafter tails, or anything on a second story is a different calculation, and paying a licensed pro upfront usually costs less than fixing a DIY job gone wrong. If your inspection turned up more soft wood than you expected, have a local pro price the repair for free before the damage spreads any further.
What should this cost you?
Answer four questions and get a fair price range for your home.